How to Solve a Patches Puzzle: A Real Board, Step by Step
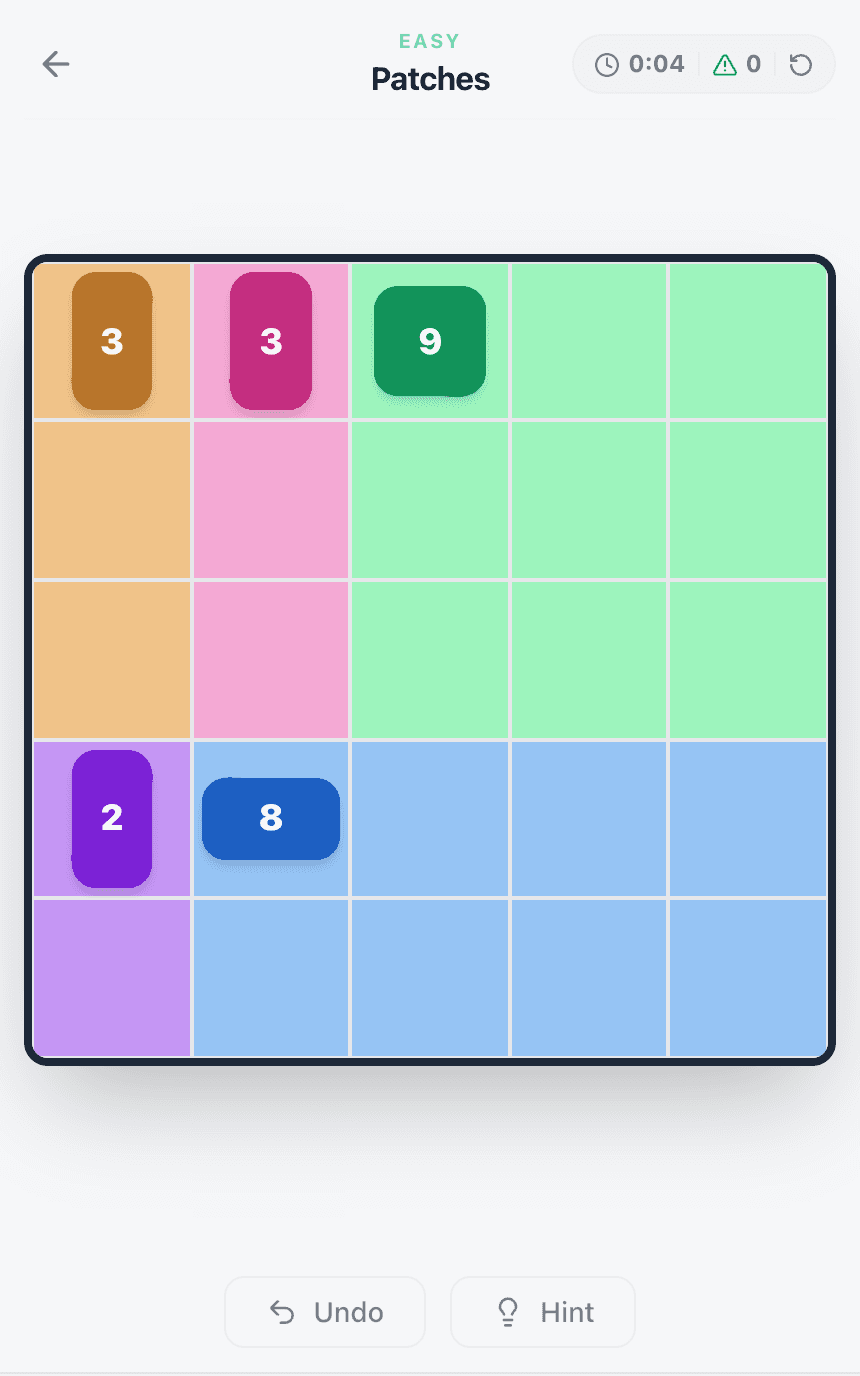
Patches looks like the simplest puzzle on the site: a grid, a few numbers, draw some rectangles. Then a rectangle that fits its number perfectly turns out to be wrong, and nothing tells you. This walkthrough solves one real board from the first look to the last patch, with a screenshot at every step, and then walks into that trap on purpose so you can see what it looks like. The board is Easy level 1, a 5×5 grid that is open to everyone, so you can keep it in another tab and draw along.
A line of context first. Patches is LinkedIn's rectangle puzzle, a descendant of the Japanese classic Shikaku. Grid Leveling is an independent site, not affiliated with LinkedIn, that makes its own boards under the same rules. The rules page has the short version.
What the Board Tells You Before You Move
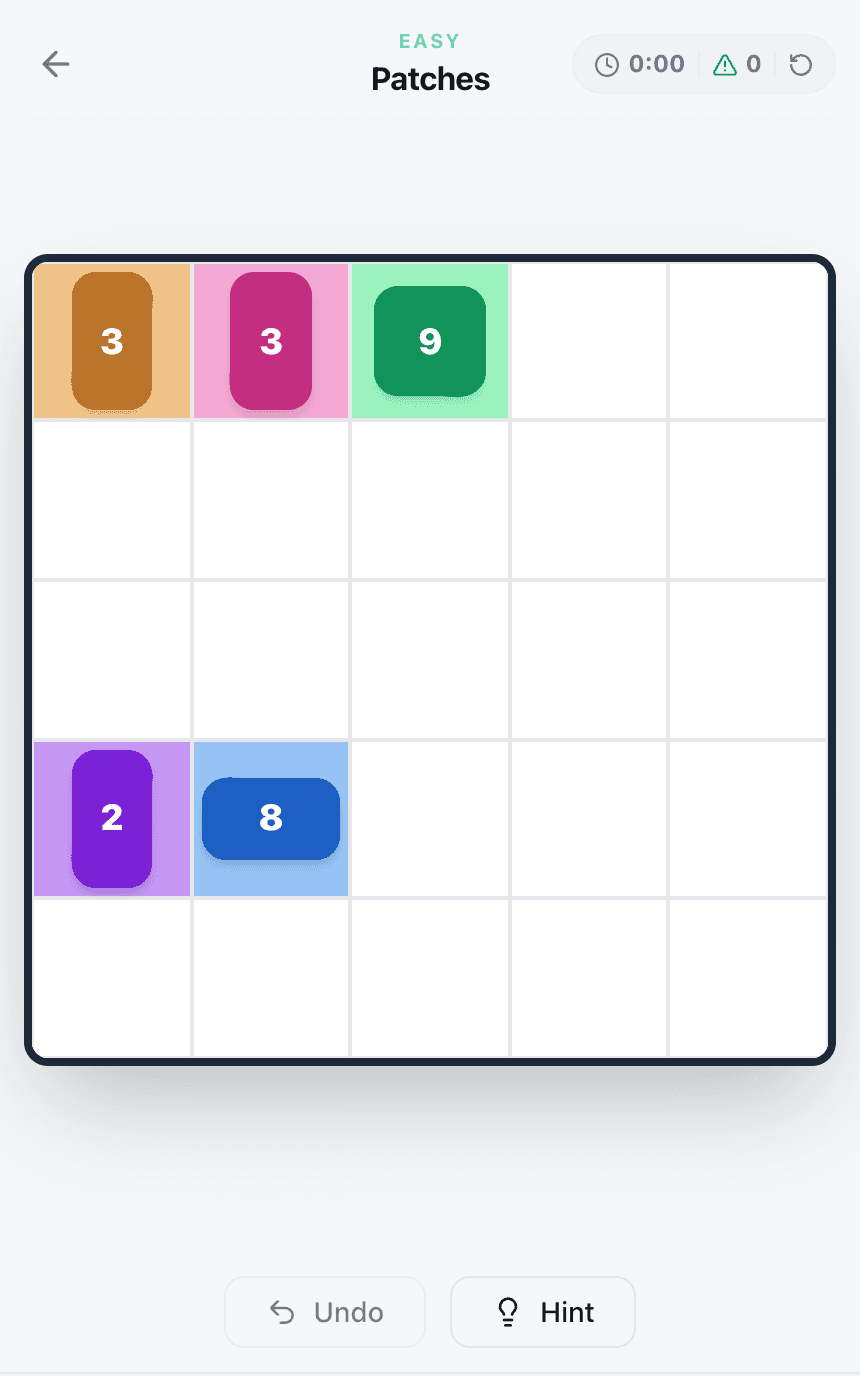
Every number is an area. The 9 wants a rectangle of exactly nine cells, the 8 wants eight, and each rectangle must contain its own number and no other. Together the rectangles cover the whole board with no gaps and no overlaps, which you can check before drawing anything: 3 + 3 + 9 + 2 + 8 is 25, and a 5×5 board has 25 cells.
The second clue is the shape of the chip the number sits on. That is the badge, and it tells you the proportions of the rectangle:
- A square chip means Square: width and height are equal. The 9 here.
- An upright chip means Tall: higher than it is wide. Both 3s and the 2.
- A sideways chip means Wide: wider than it is high. The 8.
- A plus-shaped chip means Any: every rectangle of that area is allowed. This board has none, so we will borrow one from a harder board at the end.
Step 1: The 9 Has One Shape and One Home
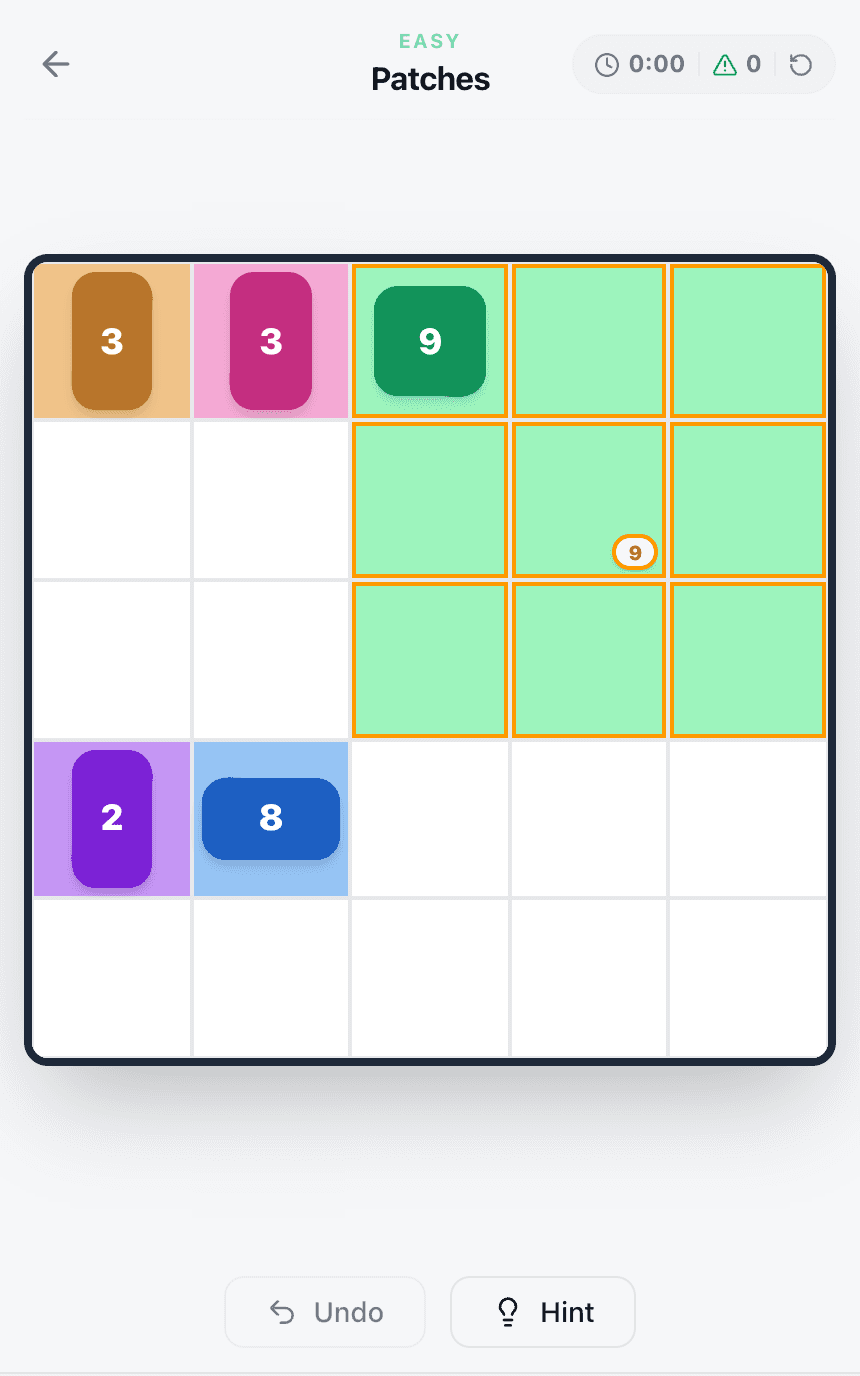
Start with the clue that has the fewest options. A Square of nine cells can only be 3×3, so its shape is settled before you look at the board. Its position nearly is too. The 9 sits on the top edge, so the square hangs down from the top row, and it can slide sideways into three positions. Two of them would swallow one of the 3s next door, and a rectangle may hold only one number. That leaves the top-right corner.
Step 2: Tall Plus a Small Number Leaves No Room for Doubt
The two 3s are Tall. Three cells can only be arranged as a rectangle in a line, and Tall means the line stands upright: one cell wide, three high. Both clues are in the top row, so there is nowhere to go but down. Two strips, three cells each, side by side down the left of the board.
Step 3: The 2 Looks Up and Finds the Cell Taken
The 2 is also Tall, so it is a strip of two cells, and from its own cell it could reach either up or down. Up is the third cell of the first 3's strip. That leaves down, into the bottom-left corner. This is the pattern for every small clue: on its own it has a couple of choices, and its neighbours remove them.
Step 4: The Leftovers Are the Last Patch
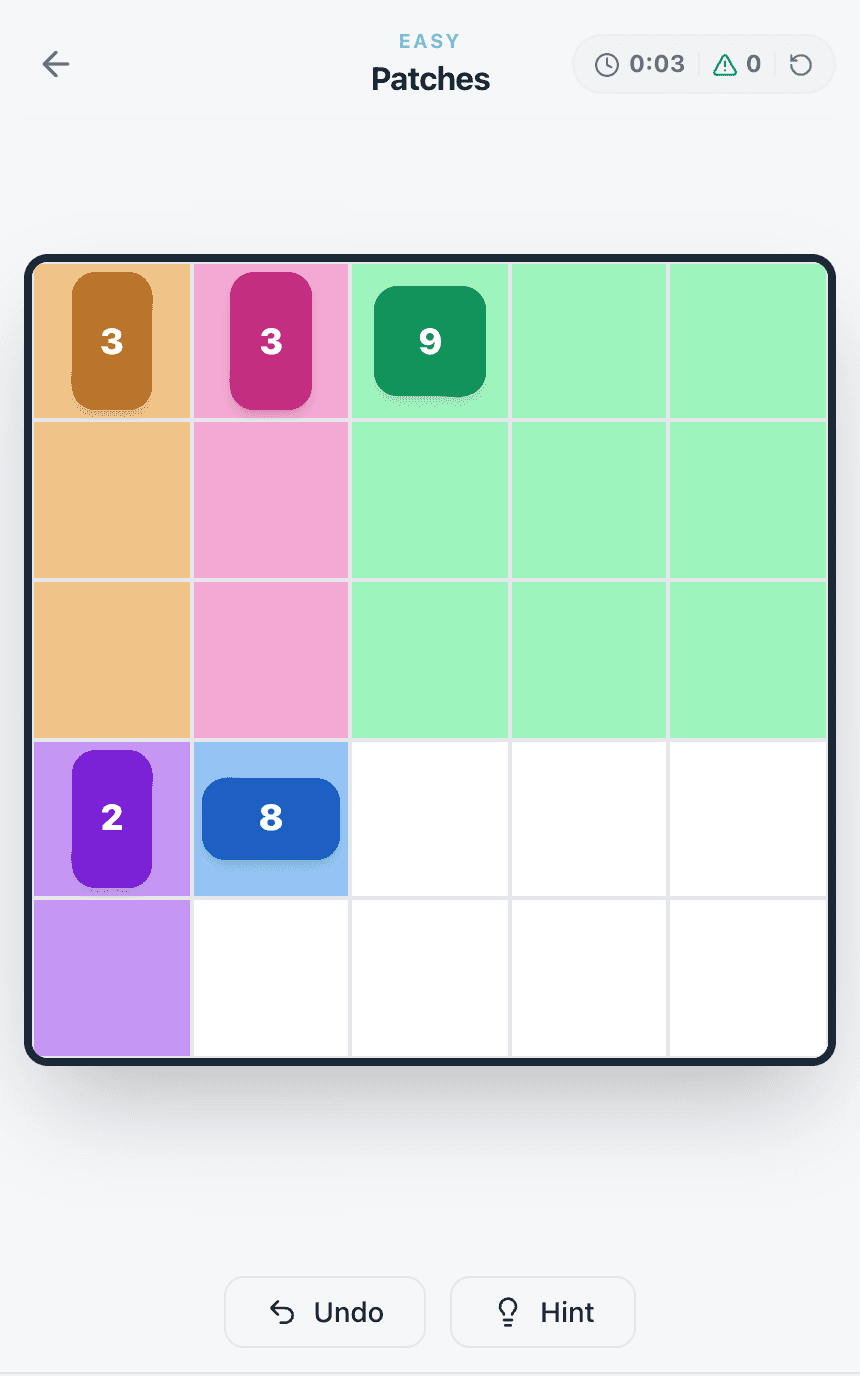
The 8 is Wide. Eight cells make a rectangle as 8×1 or 4×2, and a five-wide board cannot hold an 8×1, so it is four wide and two high. You do not even need that reasoning, because the board has done it for you: eight white cells remain, in one block, four by two, with the 8 inside. The last patch on any board is the one you never have to think about, and if the leftover cells do not form the rectangle the last clue wants, something earlier is wrong.
The Trap: A Patch the Game Accepts and the Board Does Not
Now play it badly. Suppose you start with the 8, because it is the biggest number on the left, and draw its 4×2 one row too high. It has eight cells, it is wider than it is tall, and it contains exactly one number. Every rule the 8 cares about is satisfied, so the game places it without a word.
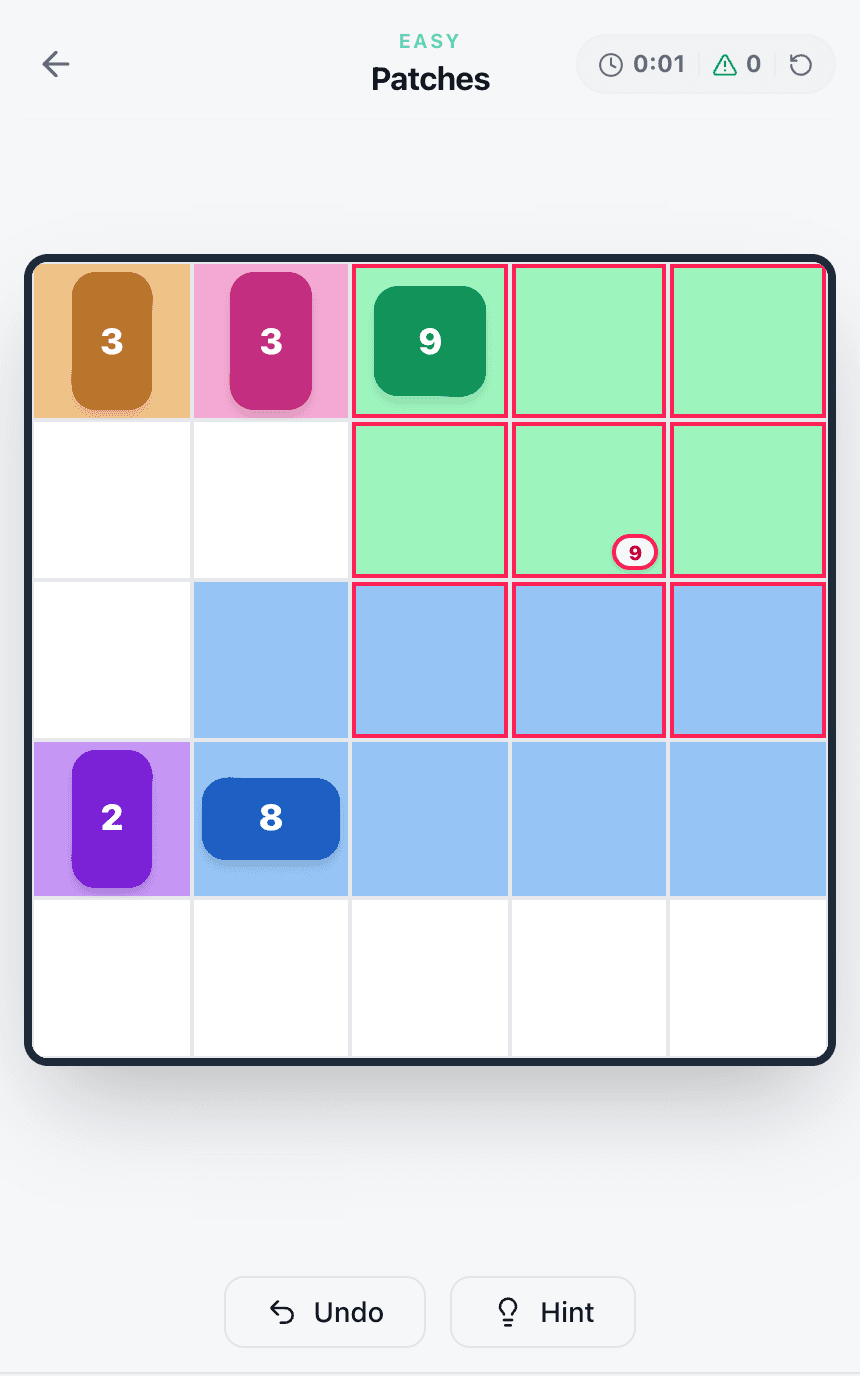
The problem only shows up when you reach the 9. Its one possible square now overlaps the 8, the outline turns red while you drag, and letting go gets you "That patch doesn't fit" and a mistake on the counter. The natural reaction is to doubt the 9. Do not: the 9 was forced from the start. The patch that is wrong is the one that went down quietly before it.
This is the difference between Patches and Wend, where the game refuses any word that is not part of the solution, so everything on the board is known to be right. Patches checks a rectangle only against its own clue. A placed patch is a claim, not a proof, and when a clue has no room left, the question is never "how do I squeeze this in?" but "which earlier patch is sitting in its space?"
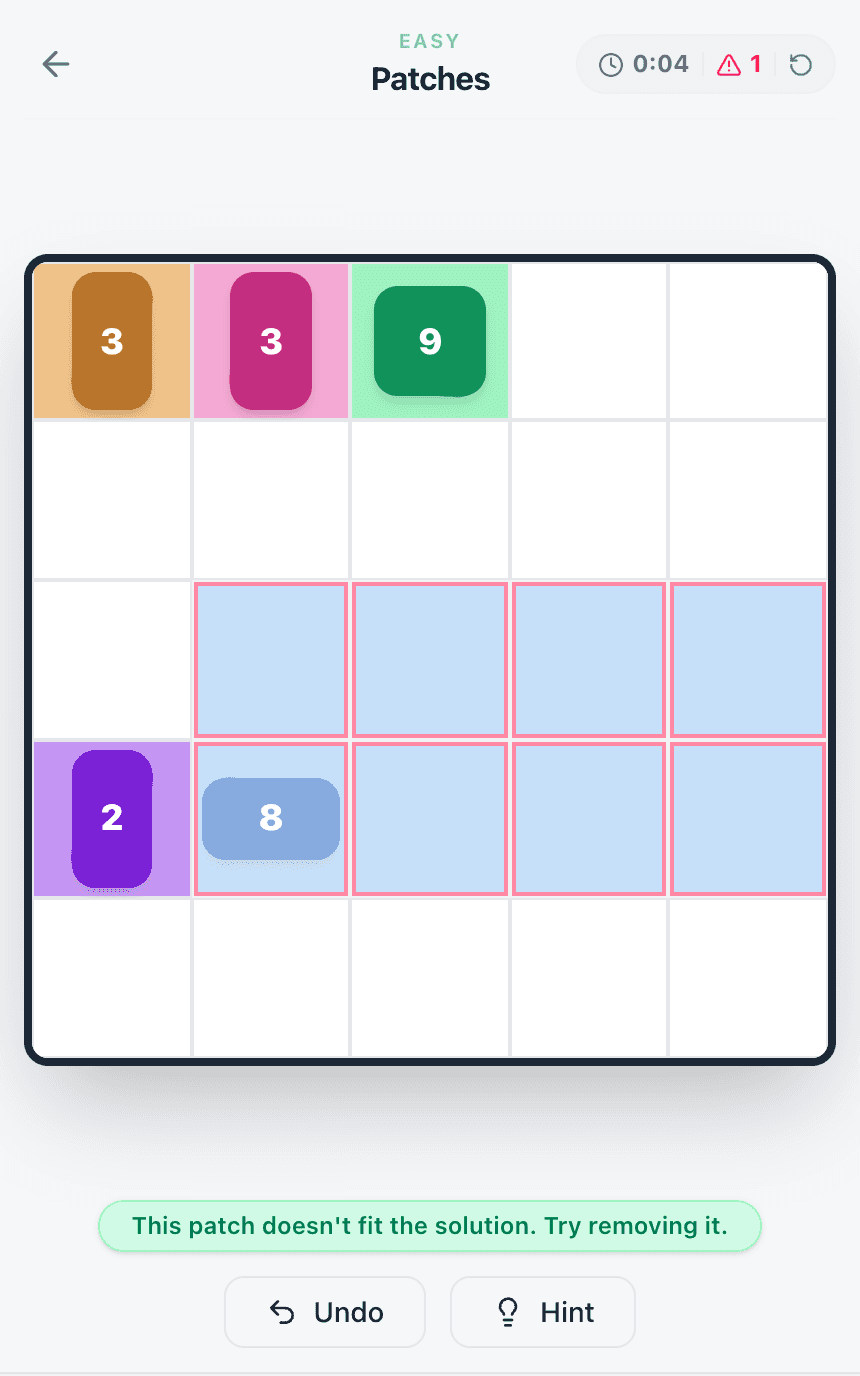
If you cannot find the culprit, the Hint button will. When a patch on the board is not part of the solution, the hint outlines it and tells you to remove it; tap any patch to lift it off, or use Undo to take back the last one. When everything placed so far is correct, the same button outlines the next rectangle and gives its size instead.
The Fourth Badge: Reading an Any Clue
Easy boards use only Square, Tall and Wide. The plus-shaped Any badge, which allows every rectangle of that area, first appears on Medium; about a third of the clues on a Hard board wear it, and on Expert it is the majority. It looks like less information. In practice the neighbours supply what the badge leaves out. Here is the first move of Hard level 1, a 7×7 board.
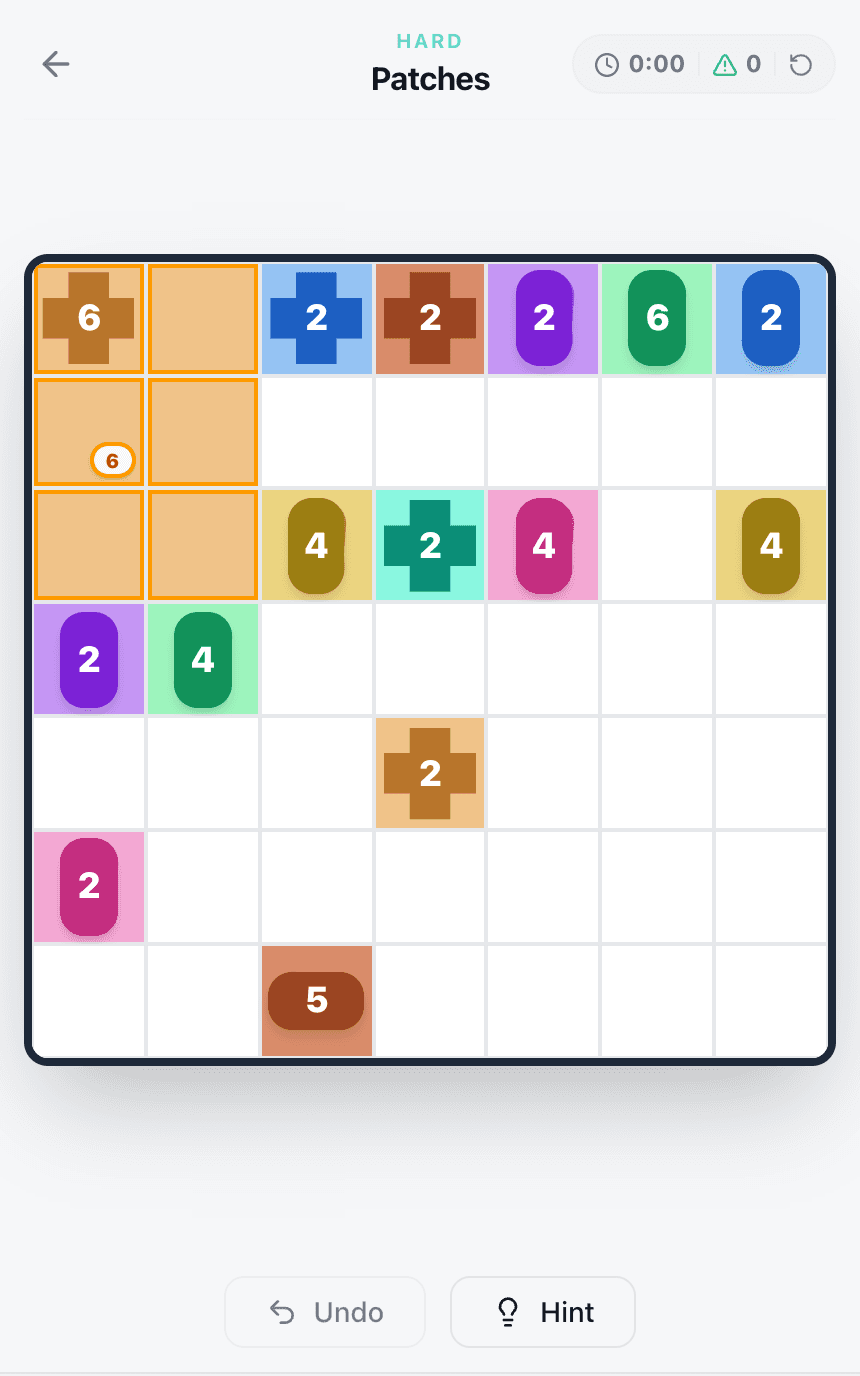
Six cells can be 1×6, 6×1, 2×3 or 3×2, and Any allows all four. But the 6 is in a corner, so its rectangle can only grow right and down. Along the top row there is another clue two cells away, so the rectangle can be at most two cells wide. Down the left column there is another clue three cells away, so it can be at most three cells high. Only one of the four shapes fits inside those limits: two wide, three high. An Any clue is solved by its neighbours, not by itself.
What These Boards Teach
- Read the number and the badge together. A Square 9 is 3×3 and a Tall 3 is 1×3 before you have looked at anything else.
- Start with the clue that has the fewest shapes: squares, prime numbers, and anything pinned in a corner.
- Let the other numbers do the cutting. A rectangle can never contain a second clue, so every neighbour is a wall.
- Treat a placed patch as a claim. The game accepts anything that fits its own clue, so when a later clue has no room, look backwards.
- Watch the leftovers. The cells that remain should always form the rectangles the remaining clues want.
Where to Take It Next
The Easy tier has 100 of these 5×5 boards, and the same checks carry up through 6×6 and 7×7 to the 8×8 Expert grids: 400 levels in all, covered in Patches unlimited. For the tactics as a checklist rather than a worked board, read the Patches strategy guide. And for one board that everyone gets on the same day, there is today's daily Patches.
Play Patches
Divide the grid into rectangles that match every clue's size and shape. A free, unlimited take on LinkedIn's Patches.